SchedulerPRO board setup
For SPRO to work, you’ll need to have the following columns set up:
-
1x Dependency column
-
1x Status column (Dependency Type)
-
2x Date columns (Start & End Date)
-
2x Number columns (Duration & Lag/Lead)
-
1x Timeline column
*Please note, the status column used as the dependency type must have labels that define the dependency relation type. The label(s) can contain any string/words but must include either [FS], [SS], [FF], or [SF] – and yes, these must be uppercase. If you use only Finish-to-Start relationships, one label is sufficient. Correct examples of such labels are: “Finish to Start [FS]” or “[FS] – forward planning” or just “[FS]”.
SchedulerPRO configuration
SPRO simply has two integration recipes: One for item level and one for sub-items. Item level recipe is independent of the sub-item recipe meaning you can choose both recipes in your board or just one. Both the recipes require same setup of board/columns.
Once you’ve installed the app:
-
Click on Integrate (Top right-hand side of your monday.com board)
-
Search ‘SchedulerPro’ in the integrations centre
-
Click on the SchedulerPro app
-
Click on (add to board) the integration recipe
-
Configure the integration recipe by selecting each underlined word and then selecting the relevant column from the dropdown provided
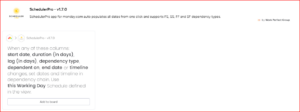
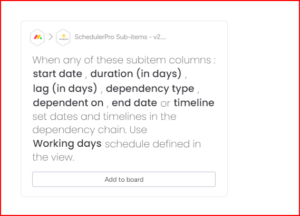
Add your Working Day Schedule
With SchedulerPro for monday.com you can now account for your 4-day, 6-day, x-day work week! You can also ensure no work is scheduled on your company specific, national, or public holidays 🐵 🏝️